Nowadays, editing photos is useful for everyone. Good photos are necessary on every platform. Whether you use Instagram or make YouTube thumbnails, the first impression is made by the photo only. People see the image first. Caption or content is read later. Photo editing makes even a simple image look pro. This is why every beginner should learn how to start editing photos. It is simple to begin. It just needs a little bit of time and practice. You should edit a little every day. Improvement happens gradually. Many people get confused as to how to learn editing which app to use? Which tools are important? This Beginner’s Guide to Editing Photos Like a Pro explains every step in a simple way.
These tips are specially designed for beginners. You can learn photo editing from your mobile phone as well. You do not need expensive devices. Just basic apps like Snapseed or Light room are enough. Free tools are available in these apps. Their use is also simple. Applying filters is only one aspect of editing photos. It is a creative skill. You can make photos fresh and powerful through editing. Your mood and style is reflected in every edit. You can tell a story through photos. Brightness, contrast, colours, and crop all these small things make a lot of difference. Editing photos makes them more professional.
It is important to focus on every detail. You will find professional-level advice in this guide. Use of tools is taught. Method of practice is also explained. You will get everything step-by-step. Edit one photo daily. Keep comparing. You will slowly improve. You will learn new tricks every day. Learning photo editing is easy as well as fun. Just get started.You can master editing as well.
Easy Tools and Apps for Beginners
Photo editing is a creative and useful skill. Every content creator should learn this. Don’t worry if you’re a beginner. Every expert was also a beginner at some point. Just devote 10 or 15 minutes daily to editing. Slowly your style will develop. One should learn how to utilize appropriate tools Snapseed and Lightroom Mobile are the best options. They’re easy to use. These apps have filters, brightness, contrast and color tools. You can make your photos fresh and clean with natural edits. Over-editing should be avoided. All you have to do is balance the color, light, and tone. Improvement happens with a little practice every day.
Editing is more than just using filters. It is an art in which you show your mood and feeling. Every photo has a new story. If you edit correctly, the image looks more powerful. Editing makes the photo good look and more professional. It makes your content serious and valuable. The first impression of the viewers is made by your image only. That is why good editing is very important.
Install Snapseed or Lightroom today. Edit your first photo. Check your progress every week. Save your old photos so that you can compare. When you see your first and latest photo, you will understand the difference. Your edited photos will start to look professional and clean. You will feel proud of your work. With just consistency and practice, you can go from beginner to pro.
Easy Photo Editing Steps
-
Select the photo
First of all, look at the photo carefully. It is important to choose a clear and focused photo. If the photo is blurry or dark, then editing becomes difficult. Photos taken in natural light are the best for editing. The photos should be a balance between light and shadow. Make the setting simple so that the subject comes out clearly. Choose such a photo which gives the best result with little editing. The photo should be zoomed in and checked for details. Select only the photo that you like. Editing is easy with a good photo. This makes the final result look professional. Choosing a good photo is the first and important step of editing. Wrong photos waste time. For this reason, it is very important to select a photo.
-
Set Crop and Frame
Cropping is the first step to making a photo better. Unwanted parts of a photo can be removed with cropping. Cropping brings focus on the subject. Straightening the photo with the Straighten tool is a must. If the photo is tilted it looks weird. Balancing the frame improves the composition of the photo. The Rule of Thirds can be used to introduce harmony to the photo. This minor editing gives the picture a polished look. While cropping, think from which angle the photo would look good. Make the photograph clean, that is retain what you want in the background and erase what you do not want in the background. The quality of the photo is enhanced as a result of proper framing. Framing your shot is a good selection to complement a story of the picture. The framing is different for every photo. Learn to experiment. Keep the subjects in the middle or off center.
-
Adjust brightness and contrast
The photo’s lighting is controlled by brightness.If the picture is dark, increase the brightness.If there is too much light then decrease it. Contrast increases the depth in the photo. Both of them should be done to an equal extent such that the picture appears natural. An excess amount of brightness or contrast is unnatural. There are different settings for every photo. Keep adjusting slowly. By setting brightness and contrast, the detail and texture of the photo appear well. This makes the photo alive and engaging. Balance of light and darkness makes the photo realistic. Good editing improves the mood and feeling of the photo. Too much brightness or contrast can spoil the original look. Therefore, patience is necessary.
-
Adjust the colors
Adjusting colours makes a photo come alive. Saturation can make colours brighter or lighter. Temperature can make a photo look cool or warm. Tint sets the color balance. Maintaining natural skin tones is important. Excessive whitening makes a photo look fake. Colour adjustment also changes the mood of a photo. Keep colours simple and natural. Don’t do too much editing. Getting the color balance right makes a photo look eye-catching. Adding a bit of warmth is sometimes preferable. Colors change the feeling and atmosphere of a photo. Good colours bring life to a photo. Wrong colours can make a photo look dull. Learn to adjust colours by understanding them. The color has to be changed according to the mood of the photo.
-
Add sharpness and clarity
Sharpness emphasizes the small details of the photo. The image appears clear and clean when it is clear. Excessive sharpness makes the photo look over-edited. While editing, every detail should be checked by zooming the photo. Increase the sharpness a little so that the photo looks natural. A photo with good clarity looks professional everywhere. Sharpness makes the edges clean and crisp. Clarity makes the photo look soft and balanced. The texture of the photo looks better. Proper sharpness makes the photo more detailed. Over sharpness can cause noise. Therefore, adjust the sharpness carefully. Clarity makes colours and shapes stand out.
-
Apply Filters and Presets
Filters and presets make editing fast and easy. Soft filters make photos look natural. Too bright or dark filters hide the original look. You can create consistency by creating your favorite presets. Gradually adjust the intensity of the filter. Consistent editing style makes your page and portfolio professional. You can create your unique style with presets. While using filters, you avoid changing the original color. These tools make editing smooth and time-saving. Filters are very helpful for beginners. Always choose filters that give a natural effect. Create presets after understanding your style.
-
Final Touches (Optional)
Small imperfections can be removed with spot healing, like dust or blemishes. Vignette effect brings focus to the centre. Background blur makes the subject appear separate. If required, add text or graphics. But keep it simple and clear. Final touches make the photo complete.Every little detail should be taken into consideration. During the final check, zoom in on the photo. If something seems wrong, make small corrections. This step makes the photo flawless. The photo’s impact is enhanced by finishing touches. Patience is necessary to make a photo better. Hard work makes the photo unique.
-
Save High Quality
After editing, it’s crucial to save the image in high definition. Saving in low quality makes the photo blurry. Use JPEG or PNG format. Save after setting the quality to 100%. Verify that the original information is kept. Saving in the original size will look good on every platform. High quality photos look professional. Taking backup is also important. Good quality makes your work look good. This increases the value of hard work. Low quality photos look less professional. Therefore, remember to save it in the appropriate quality.
Common Beginner Mistakes
- Over Editing: Too many filters and saturation make the photo look fake.
- Low Quality Save: It is wrong to save the photo in low resolution after editing.
- Skin Tone Ignore Karna: Excessive whitening makes the skin look unnatural.
- More text and stickers: Too many things destroy the impact of the photo.
- Before/After Check Na Karna: Not comparing after editing stops progress.
- Framing Goes Wrong: If the cropping or angle is not right then the photo looks weak.
- Wrong use of lighting: Light balance is important in every photo, otherwise it looks harsh or dull.
Beginners often make these mistakes while editing. First of all, one should avoid over-editing. Too many filters and brightness do not make the photo look natural. While smoothening the face, the original texture is lost. This makes the photo look fake. The second mistake is saving in low resolution.When you save a picture of low quality then the picture will be blurred.
This does not look good on social media. Skin tone should also be taken care of. Excessive whitening or blurring makes the face look like plastic. A lot of people decorate the picture with stickers and additional text. This takes away the focus. Simple photos look more classy.One must view the before and after of each edit. This lets us know whether the edit was correct or not.
If you use framing and light correctly, the photo improves a lot. The light should not be harsh or completely dark. Just by doing the basic things right, your image starts to look clean and professional.Editing requires a great deal of work.
Pro Tips for Quick Growth
-
Use natural light
Photography should be done using natural light. This causes the colors to look better and natural. Every photo requires the balance of light. Shadows become smooth when the light is soft. So, take pictures in soft light, which could be in the morning or the evening. When you are taking some indoor photography you should stand against a window. The colour of artificial light can look a little strange and it is difficult to fix it.Using natural light makes photo editing simple. Good light makes details visible clearly, which improves editing. Having control over lighting is important for photo quality.
-
Save presets
Creating presets makes editing faster. You can save your favorite settings. It is easy to apply the same effects to every photo. Presets keep your editing style consistent. This is the best tool for beginners. When you edit a new photo, you save time by applying a preset. There are a lot of paid and free presets on the internet. You can save your favorite edits by creating a preset. Presets make it simple to alter the image’s mood. Your followers will appreciate your style if you edit frequently. Using presets reduces mistakes.
-
Edit by zooming
By zooming even small things become visible. You learn where the issue is. You can easily remove spots or dust on the skin. By zooming you can do better cropping. Cleaning the background becomes easy. It’s critical to thoroughly examine every angle. Zoom makes editing look professional. You can also correct small mistakes. You can make photos perfect by zooming. The quality is raised by paying close attention to every edit.
-
Minimal Edits
Everyone likes natural photos. Heavy editing makes a photo look fake. Photos look beautiful with a few basic edits. Keep the brightness, shadows and contrast correct. Too many filters take away the original look of the photo. Simple colours look professional. You should not add too many things. Light touch-up makes photos fresh and clean. Minimal editing makes photos look classy. The purpose of editing is to make the photo natural, not too much.
-
Practice editing a photo daily
Your skills improve with daily practice. You understand the editing tools better. You learn new things by doing a little editing every day. Confidence increases and mistakes are reduced. You can see your progress every week. You can understand your mistakes from old photos and correct them. Making a routine helps in learning. Your style develops with practice. It is important to devote time daily to become sharp in editing.
Power of Editing in Social Media
If you are a content creator, photo editing is a must. It is also helpful for influencers. It is also useful for those running small businesses. Good editing makes the photo look clean. The image looks fresh and bright. Visuals are very important on social media. Strong photos get more likes on Instagram. People share them on Facebook. Good thumbnails increase views on YouTube. Good photos get people’s attention on Pinterest.

If every photo is the same then the page looks professional. People start remembering your style. The brand’s image becomes strong. The look of the page also improves. Canva is easy to use. Light room is also good for beginners. These tools have filters and effects. You can learn editing with practice. Edit for a little while every day. Your skills will improve.
Adjust the brightness in editing. Improve the color a little. If necessary, crop it. The mood of every image is different. Editing should be done accordingly. If the photo is good, people will stop and look at it. They will read the caption later. The first image itself makes an impression.
If your content is strong, there will be growth as well. The audience will be engaged. Traffic will increase on the page. A good photo works on every platform. Editing is a basic skill. Every creator should learn this.
Practice And Learning Resources
Learning never stops. Every photo edit gives a new idea. You can watch easy tutorials on YouTube. Their editing is taught step by step. There is content for people of every level. There are simple tips for beginners. There are also guides for advanced users.
Watching editing reels on Instagram is also beneficial. You get to learn quickly there-the tricks are straightforward and the reels are brief. You learn to use editing apps. Explore Lightroom’s presets. These filters make editing easy. You can also adjust them.
Save pictures from Pexels, or pixabay or Unsplash. Practice editing these photos. You will work with different lights and colors. Practice will help you understand the tools. Spend some time each day editing. Start slowly but do it daily. Photos that were dull earlier will now look clear. Your editing style will improve. Colors will be more balanced. Light will look better. You will yourself feel your progress. Confidence will increase and you will also get motivation.
Patience is essential to learn good editing. There will be mistakes but keep learning. Each picture is an opportunity to get another knowledge. Editing is a skill that gets stronger with time.
- Watch an editing tutorial daily on YouTube
- Note down short tips from Instagram reels
- Explore and adjust Light room presets
- Practice editing one photo every day
- Check your editing progress every week
- Compare old and new photos
Photo Editing Tools & Accessories
Some tools are necessary for photo editing. First of all, you should have a good smartphone. The camera takes clear and sharp photos. High quality helps in image editing. Using a tripod makes the photo stable. Shake does not blur the photo. It is easy to take hands-free photos with a tripod. Mobile lenses are also useful. Macro, wide and zoom lenses change the look of the photo.
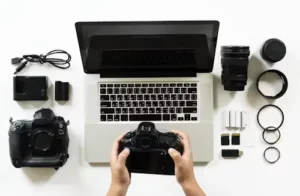
These lenses can be easily fitted on the phone. Stylus pen helps in detail editing. Skin retouch and color fixing is easy. Stylus gives better control. Ring light gives soft light. It makes the face and product visible clearly. Harsh shadows do not fall. If the light is good the photo looks better. External storage is also important. It is safe to take backup of edited photos. Hard drive or Google Drive are useful options. The phone or tablet should be fast. Editing is difficult with a slow device.
A color calibration tool is also helpful. This makes the colors of the screen look correct. A lens cleaning kit is also important. Fingerprints or dust can cause the picture to become blurry. These tools make editing easy. Beginners can slowly pick up these tools.They are practical even though they are not costly.Their use improves the result of the photo. Every content creator should use these tools.
Conclusion
Photo editing is a creative skill. Learning it is enjoyable and beneficial. Every content creator should know this. If you are a beginner then there is nothing to worry about. Every expert was also a beginner once. Just devote 10-15 minutes daily to editing. You will gradually improve.
It is important to find the right tools. Snapseed and Lightroom Mobile are the best apps. They are easy to use. These apps have filters, light tools and color options. You can naturally enhance your photo.
Natural edits look good. Avoid over-editing. Just balance the colors and light. Your style will develop with daily practice. Patience is very important in editing. There will be mistakes, but you should never stop looking.
Download Snapseed or Lightroom today. Edit one of your photos. Do it in the following way. Register your improvement weekly. When you compare old and new photos, you will see the difference yourself.
You will be amazed. Your edited photos will start looking professional. With a little hard work you can become a pro. You just need to get started.Your content can reach a new level with effective editing.